Create react library from scratch using Webpack and babel and publish on NPM

May 23, 2021  •   10 min read

Okay, so there is a simple solution for creating your own react library using bit.dev or create-react-library package which gives you the build process pre made. You just need to write your component and publish. But I personally like to have more control over the packages. For ex - create-react-library created an additional css file in the build and I had to include that css file in consumer project. I don't want that.
We can use this to publish single component or multiple components. Doesn't matter. Let's start.
Steps:
  • setup regular react project with webpack, babel
  • set libraryTarget umd in webpack output
  • set externals in webpack config to exclude node modules
  • make a index.d.ts file in root to declare and export your component name
  • point main file in package.json to output file generated in dist folder
  • Setting up react, webpack, babel

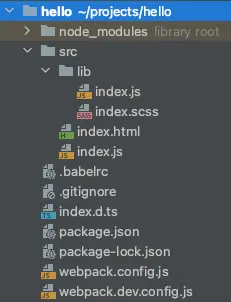
    make a dir hello and run npm init inside it

    add .gitignore file to exclude node_modules

    install the following packages with -D flag (dev dependencies):


    babel: @babel/core @babel/preset-env @babel/preset-react

    webpack: webpack webpack-cli webpack-dev-server webpack-node-externals html-webpack-plugin node-sass

    loaders: css-loader babel-loader sass-loader style-loader url-loader

    react: react react-dom

    You can use styled-components - the css in js concept. And you won't need these css, style and sass loader and node-sass.
    Webpack cli and dev server might create problems - version compatibility. You might need to hit and try with different versions. I had to downgrade webpack-cli version to 3.3.12 from latest version to make it work.
    The project should look like this
    project-structure
    This is the package.json file. Add the start and build scripts.
    
    {
      "name": "hello",
      "version": "1.0.0",
      "description": "",
      "main": "dist/main.js",
      "scripts": {
        "test": "echo \"Error: no test specified\" && exit 1",
        "start": "webpack-dev-server --config webpack.dev.config.js",
        "build": "webpack"
      },
      "author": "",
      "license": "ISC",
      "devDependencies": {
        "@babel/core": "^7.14.3",
        "@babel/preset-env": "^7.14.2",
        "@babel/preset-react": "^7.13.13",
        "babel-loader": "^8.2.2",
        "css-loader": "^5.2.5",
        "html-webpack-plugin": "^5.3.1",
        "node-sass": "^6.0.0",
        "sass-loader": "^11.1.1",
        "style-loader": "^2.0.0",
        "url-loader": "^4.1.1",
        "react": "^17.0.2",
        "react-dom": "^17.0.2",
        "webpack": "^5.37.1",
        "webpack-cli": "^3.3.12",
        "webpack-dev-server": "^3.11.2",
        "webpack-node-externals": "^3.0.0"
      },
      "peerDependencies": {
        "react": "^17.0.2",
        "react-dom": "^17.0.2"
      }
    }
    
    Notice the main file. You can add more details like keywords, github repo link, author etc.
    Add a .babelrc file
    
      {
      "presets": [
        ["@babel/preset-env", {
          "targets": {
            "node": "10"
          }
        }],
        "@babel/preset-react"
      ]
    }
    
    The env preset is evolving. There were some features like spread operator or async await didn't use to work directly and hence providing the node target helped. But now they work directly, so you can remove the node target parameter.
    Add a webpack.dev.config.js file. This will be used for development.
    
    const path = require('path');
    const HtmlWebpackPlugin = require('html-webpack-plugin');
    
    
    module.exports = {
      entry: './src/index.js',
      devtool : 'inline-source-map',
      plugins: [
        new HtmlWebpackPlugin({
          template: './src/index.html',
          filename: 'index.html'
        }),
      ],
      module: {
        rules: [
          {
            test: /\.js$/,
            exclude: /node_modules/,
            use: {
              loader: 'babel-loader'
            }
          },
          {
            test: /\.scss$/,
            exclude: /node_modules/,
            use: [
              {
                loader: 'style-loader',
                options: { injectType: 'singletonStyleTag' }
              },
              "css-loader",
              "sass-loader"
            ]
          },
          {
            test: /\.(png|jpe?g|gif)$/i,
            loader: 'url-loader',
          },
        ]
      },
      devServer: {
        port: 5001
      }
    };
    

    Here entry is src/index which imports the components and renders them in html root div.

    HtmlWebpackPlugin is used to inject scripts and styles inside index.html

    babel loader for transforming new es syntax to old compatible code.

    style loaders - they work in reverse order. sass-loader to transform scss into css. Then css-loader to load css styles. And then style-loader to put those styles into style tags. You can skip the options in style-loader.

    url-loader for putting images into js

    Add a webpack.config.js file - config for final build
    
    const nodeExternals = require('webpack-node-externals');
    
    module.exports = {
      entry: '/src/lib/index.js',
      output: {
        filename: "main.js",
        libraryTarget: "umd",
      },
      module: {
        rules: [
          {
            test: /\.js$/,
            exclude: /node_modules/,
            use: {
              loader: 'babel-loader'
            }
          },
          {
            test: /\.scss$/,
            exclude: /node_modules/,
            use: [
              {
                loader: 'style-loader',
                options: { injectType: 'singletonStyleTag' }
              },
              "css-loader",
              "sass-loader"
            ]
          },
          {
            test: /\.(png|jpe?g|gif)$/i,
            loader: 'url-loader',
          },
        ],
      },
      externals: [nodeExternals()]
    };
    
    Difference between dev and main webpack config is:
  • removed the source map, html plugin
  • entry points to lib index
  • added externals
  • Now you can add react and react-dom specifically in externals to leave them from building in our library code or you can use this plugin webpack-node-externals to exclude all node modules.

    Let's write our sophisticated library components!
    Add a src folder. make index.js, index.html, and a lib directory which will contain our components. We shall export 2 components.

    The famous HelloWorld and the infamous InputBox

    export all your components in the src/lib/index.js file
    src/lib/index.js
    
    import React from "react";
    import "./index.scss";
    
    
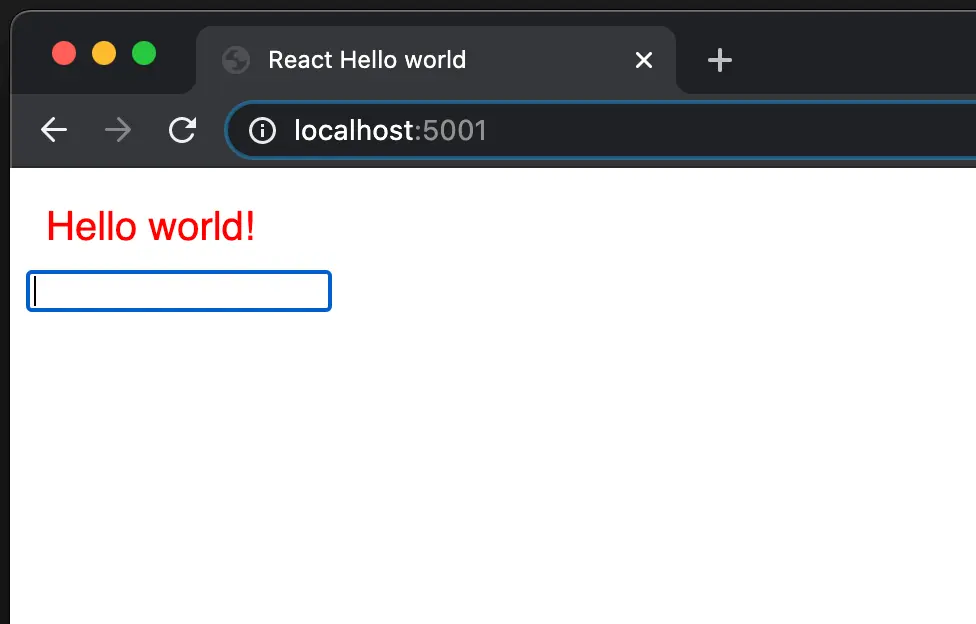
    export const HelloWorld = () => {
      return (
        <div className="hello-wrapper">
          Hello world!
        </div>
      );
    };
    
    export const InputBox = () => {
      return(
        <div>
          <input />
        </div>
      )
    }
    
    /*
        make components directory for better structuring and export everything here.
        export {HelloWorld} from "./components/hello";
        export {InputBox} from "./components/input";
    */
    
    src/lib/index.scss
    
    .hello-wrapper {
      padding: 10px;
      font-family: sans-serif;
      font-size: 20px;
      color: red;
    }
    
    src/index.html
    
    <!--<!DOCTYPE html>-->
    <html lang="en">
    <head>
      <meta charset="UTF-8">
      <meta name="viewport" content="width=device-width, initial-scale=1.0">
      <meta http-equiv="X-UA-Compatible" content="ie=edge">
      <title>React Json Viewer</title>
    
    </head>
    <body>
    <div id="root"></div>
    </body>
    </html>
    
    src/index.js
    
    import React from 'react';
    import reactDom from 'react-dom';
    import {HelloWorld, InputBox} from "./lib";
    
    const App = () => {
      return(
        <div>
          <HelloWorld />
          <InputBox />
        </div>
      )
    }
    reactDom.render(<App/>, document.getElementById("root"));
    
    
    Everything is ready. Run npm start and open localhost:5001components-render
    Add a index.d.ts file to declare components.
    
    export declare const HelloWorld;
    export declare  const InputBox;
    
    run npm run build and our library is ready to test and publish. You can test it in any regular 'create-react-app' by running npm i ~/projects/hello.
    If you use hooks in your library, everything will work fine in your library, but you might face issues while testing in consumer project. But don't worry, it will work fine after publishing. It's a known issue.

    Here's consumer react project app.js

    
    import {HelloWorld, InputBox} from 'hello';
    
    const App = () => {
      return (
        <div className="App">
          <h1>This is consumer app</h1>
          <HelloWorld />
          <InputBox />
        </div>
      )
    }
    
    Now its very simple to publish. login to npm and publish. Make a readme.md file in the root and provide a good documentation. If your package is scoped like @abc/hello, you'll need to pass access public flag with publish command.
  • npm login
  • npm publish --access public
  • Everytime you update something, remember to update the version in package.json file, even if you update package or readme and follow the same steps.

    I published a component with the same setup. You can refer it's code if you get stuck somewhere or face any node package version issues.

    https://www.npmjs.com/package/@sudobird/react-json-viewer

    ----- 🥳 Hurray 🥳 -----